
Stay Up To Date With Us!
We will never spam you or share your email address.
Game Sound Design Strategies
GSD StrategiesCheck out the gamesounddesign.com strategies when you are feeling creatively uninspired. Each random strategy will present you with a new avenue to pursue. Give them a try!
Game Sound Design Glossary
GSD GlossaryOur game audio glossary has all the sound terms you have been wondering about. Game audio can be confusing enough without having to deal with a new technical language. We are constantly updating the database with new terms that relate to not only game audio but game developer terms as well.
How To: Record Bullet Whizz-Bys And Ricochets
Article by George Spanos
Loading up a slingshot with various metal pieces and washers can definitely be a dangerous experiment in sound design. However, if done right, you can definitely obtain some great swish, whiz, and zing by sound effects which can be used as part of bullet impacts and as projectile whiz-bys. This can lead to greater player immersion within your games, and also provides a sense of reality and of utmost danger. The sound of a red-hot bullet impacting the ground near the player will surely make him/her aware of the imminent danger that the game currently calls for.
First let me start off with the reason why we wanted to capture these sounds. While there definitely are some great sounding bullet whiz-bys in the conventional sound effect libraries, it can get tiring to always hear the same ones. Not only that, but we thought that we could improve upon what we found in our commercial sound libraries, making for more interesting sounds in our game development.
If you decide to attempt recording your own slingshot whiz-bys I cannot stress enough the need for safety. Make sure everyone on the team has safety goggles, and that the area is clear of people who might accidentally walk into the slingshot's line of fire. Ok, that being said, here are some tips for successfully recording your own whiz-by sound effects.
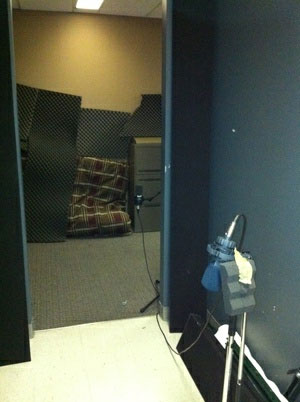
Unfortunately for us, we could not find a room that was quiet or long enough for us to launch projectiles in. So we had to make do with a hallway in the office... which was ok, but still had a considerable amount of background noise from the air conditioning units and the nearby elevators. Luckily, we were able to cut the resulting recordings pretty close so that background noise is limited and didn't colour the resulting sound effects too much. If you are going to try this, I definitely recommend finding a quiet and long room to do it in, if possible.
Secondly, it is important to experiment with microphone placement (as is always the case). We used two AKG 414s, one set to cardioid, the other to omnidirectional. We made another error here in that we should have opted for cardioid or even a hyper cardioid pattern on both mics. Ideally, we would have got our hands on a quality shotgun microphone as well, but we did not have access to one on that day. As always though, experimentation is key and what worked and didn't work for us might be the opposite for you... that's the fun of this job!
Microphone placement relative to the source and impact is also very, very important. You'll want to place the mic a suitable distance away from the impact site so as to avoid picking up the impact before the tail of the whiz-by has fully diminished. Again, this can be hard to achieve if you do not have a large enough space. Check out the video and pics for more ideas of how to place your mic(s).
Now, on to the fun stuff. The slingshot I used was fairly cheap... $10 at a local hardware store, and it performed impeccably well. These things can launch objects at over 200 mph so you have to be very careful of people who are around you. Not only that, but you must be careful around your expensive mics as well. Unfortunately for the microphone, aiming pretty much right in front of it will yield the best results, which can mean potentially hitting the mic. We helped to avoid this by placing a little foam on the side of the mic so if a washer happened to hit it, hopefully the foam would absorb most of the impact.
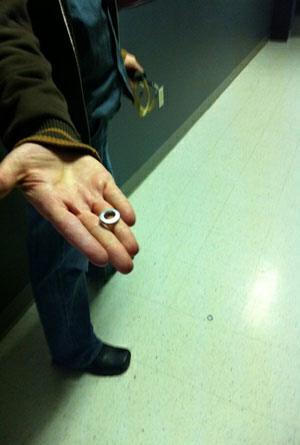
It is very important to try out a number of different objects to get your whiz-by sounds. We had some great luck with average sized washers that were fairly light. We also had some luck with springs as well. Be creative, that's the key.
Take a listen to some of the examples below, after we edited and eq'ed them. I've included some pics and a video as well, though the video only captured audio from the slingshot's perspective, not the microphone's.
Recording Washer Whizz-Bys from gamesounddesign on Vimeo.